| May | ||||||
|---|---|---|---|---|---|---|
| Mon. | Tues. | Wed. | Thur. | Fri. | Sat. | Sun. |
| Zucchini Parmesan | ||||||
| 3 Cheese Spinach & Broccoli Pizza | Corn Chowder | Garlic-Mustard Glazed Chicken Kebobs | Swedish Meatballs, Mashed Potatoes | Game Night | Pan Fried Falafel, Tzatziki, Greek Salad | Mother's Day |
| Spinach & Broccoli Calzones | Baked Salmon w/Tomato Mayo | BBQ Chicken stuffed in a loaded Baked Sweet Potato | Beef Stir Fry w/Snap Peas | Eggplant Balls w/Marinara | Black Beans with Homemade Tortillas | Rosemary Balsamic Chicken over Salad |
| Sicilian Pizza | Sweet Potato & Pecan Burgers with Caramelized Onions | Grilled Herb Chicken, Grilled Summer Squash | Kefta and Zucchini Kebabs | Sausage-Stuffed Potatoes, Spinach | Salmon Patties | Cranberry Orange Chicken, Rice |
| Grilled Pizza | Cream Cheese & Parmesan Baked Salmon, Baked Potato, Spinach | Sweet & Spicy Wings, Sweet Potato Fries | Stuffed Cabbage | Chinese Barbecued Pork, Fried Rice | Anniversary | Pollo Rosa Maria, Mashed Parsnips |
| Memorial Day | Cobb Salad | |||||
Saturday, April 30, 2011
May Meal Plan
As I was scrolling through my recipe box looking for dinner ideas I was dismayed to find that less than one percent of the recipes in there were wheat-less. Yikes! Nearly everything was pastas, breads, had breading, etc. Using less wheat and avoiding processed foods is going to require more thinking outside the box than I had first thought. We have become such a bread centered society it is hard to avoid it. There are still some bread-type recipes (like all the pizzas on Mondays, I love pizza) but there are a lot less of them this month than there were for previous months. Enjoy!
Friday, April 29, 2011
Canned Salmon Burgers

Sometimes when I read the title of a recipe I kind of cringe wondering how in the world someone thought that was a good idea. And then I look at the accompanying photo and think, "Hmm, actually that doesn't look too bad. In fact, it looks rather tasty. Actually, why don't I go see if we have the necessary ingredients, Hey, Babe? Dinner is going off schedule tonight." This was one of those times. Except, since we didn't have the ingredients, it got added to the upcoming menu instead of cutting in line.

In our house we eat Salmon Salad Sandwiches the way that most people eat Tuna. With a little mayo, some spices, and hopefully some finely diced celery and onions all mixed together and spread on a piece of toasted rye or a nice hard roll. In that application it is delicious, cravable even. Unfortunately all I could picture was a scoop of that dolloped onto a hot greased skillet and fried into a gooey, gross mess. Blech!

Upon seeing that the recipe called for a slightly different and much more effective approach than the one in my wild imagination, I decided to see if it was a satisfactory way for Hey, Babe (the fish hater) to enjoy eating a fishy-fish (his opinion) like Salmon. Does it tell you anything if I mention that he requested it be added to next month's menu? Delicious!

Since we aren't eating much wheat at the moment, and the instances we are eating it are reserved for such delicacies as pizza (yum, yum, and yum!), the next time we have these Salmon Patties we will be eating them over a bed of salad instead of rolls. But these patties? They will still be delicious, breadless or otherwise. Enjoy!

Salmon Patties
adapted from Dana
Ingredients
1 (14 3/4 ounce) canned salmon, drained and fluffed with a fork
1/4 cup onion, minced
1/4 cup parsley, minced
2 garlic cloves, crushed/minced
1/4 cup cornmeal
1/4 cup flour (next time I'm trying Parmesan here, I'll let you know how it goes!)
1 egg, beaten
2 Tablespoons mayonnaise
1 tsp lemon juice
dash salt
dash pepper
dash Tabasco Sauce
Oil for frying
Instructions
To a medium bowl add all the ingredients and mix to combine well. Divide the mixture into four even portions and then use your hands to press each portion into an even patty, around 1/2 - 1 inch thick.
Heat a heavy skillet over medium high and add some oil to coat the bottom of the pan (1-2 tablespoons). When the pan and oil are hot, fry the Salmon Patties until they are golden on each side.
Thursday, April 28, 2011
Salisbury Steak and Potatoes

Growing up, every once in a while we would be allowed to have tv dinners as a special treat. There was something special about getting to pick your own entree without a concern for who else liked it, and to have your own personal tray of perfectly portioned out dinner and your own dessert too. None of which you had to share!

Most often the way I chose which dinner I wanted was based on the dessert included. I remember wanting to go with Mom to the store to pick out my dinner instead of just placing my order, so to speak. That way I could see what was available and make sure I got a good combination. Cell phones would have come in quite useful at the time, I'm sure.

Unfortunately, sometimes the dessert I wanted was accompanying a meal I didn't. When that happened I still got the dessert it just meant I had to eat something gross first, Salisbury Steak for example. I never really cared for it, and since the only time I had tasted it was in a prepackaged dinner that isn't very surprising. What is surprising is that when I saw a recipe for Salisbury Steak, I got a weird nostalgic craving for it, a food I'd never liked.

After reading the recipe and seeing all that Salisbury Steak could have been I was tempted to try it, and eventually gave in. The tender and moist beefy patties weren't spongy like a remembered. The rich and hearty mushroom sauce wasn't nearly as salty and was missing a distinct chemical aftertaste. In other words, it was delicious and beyond surpassed my childhood memories. Enjoy!

Salisbury Steak
Ingredients
1/2 cup milk
1/2 cup instant potato flakes (not granules or buds, they won't work here)
1 pound lean ground beef
1/2 teaspoon salt
1/2 teaspoon pepper
4 tablespoons butter/oil
1 large onion halved and sliced thin
1 pound white mushrooms sliced thin
1/2 tsp salt
2 tablespoon tomato paste
2 tablespoons all-purpose flour
2 cups beef broth
Instructions
In a large bowl combine the milk and potato flakes. Add the beef, salt and pepper and using your hands mix it until it is thoroughly combined (you don't want pockets of mashed potatoes!). Shape into 6 patties, about 1/2-inch-thick each. Refrigerate for 1-4 hours to allow them to set up a bit..
In a large skillet set over medium high, heat 1 TB oil and cook the patties 5 minutes or so per side until they are well browned. Remove the patties from the pan to a plate. To the empty pan add the remaining oil and cook the onions for 5 minutes until they are soft. Add mushrooms and salt and cook until their liquid is gone, about 6 minutes.
Mix in the tomato paste and flour and cook, stirring, about 2 minutes. Stir in the broth and bring to a simmer before returning the patties to the pan. Reduce heat to medium low and cover, cooking the patties for 12 minutes or so until they are cooked through. Season to taste with more salt and pepper if needed.
Wednesday, April 27, 2011
Daring Bakers Make Mousse in an Edible Container


So, can I tell you a secret? I'm not writing this at the last minute. It always seems that real life craziness gets in the way of my ability to complete the Daring Challenges until the very last minute (like the day it is due to be posted) and then I find myself up late after the kids are in bed trying to get the post finished. Not this time! I have more than a week to go before this post will publish. It feels kind of...strange actually. But I think I like it.

When I first read this challenge, I only skimmed over it assuming that it was the same as the Daring Cooks edible container challenge, except sweet instead of savory. I missed one key detail in reading the instructions where it said, "There are 2 mandatory components to this challenge. You must make one of the 2 maple mousse recipes listed below and you must make an edible container in which to place your mousse for presentation." They even put them in bold. Somehow I thought I could make any filling and it wasn't until the other day that I realized I was suppose to make a maple mousse.

When I realized the filling had already been selected for me I didn't really mind, but I wasn't able to get back to the store to get the real maple syrup that was required. Not seeing any time in the near future that would be convenient to pick some up and wanting to get started filling the bowls I had already made, I decided to go with Honey, which had been presented as an alternative. The dried pineapple bowls were inspired by the dried pineapple flowers on Martha Stewart's site, which I saw quite some time ago. Her recipe says you only need to dry them for around an hour which I found not nearly sufficient. Perhaps if you can manage to get your pineapple slices paper thin that will be fine, otherwise expect to check it every half hour or so until it is nice and dry and tacky.

I'm wondering if it would have helped to dried them flat for the first half hour or so before trying to flip them over and place them in my silicone muffin cups. Trying to fit the stiff, fresh pieces of pineapple was a little tricky because they wanted to tear and break but I noticed when I was checking on them that they had become much more pliable after a little time in the oven. Be sure that you dry your pineapple on some parchment paper, or a silpat, or something else that it won't stick to otherwise you will end up rather aggravated later. The muffin cups I used were a gift from one of my brothers (hmm, I seem to get a lot of cooking paraphernalia from those guys) and I don't get to use them often but they worked marvelously for this. I might make some individual sized fruit leathers in them soon.

Here I am rambling on and I haven't yet told you how wonderful the pineapple and honey went together! The mousse on it's own was incredibly sweet and I can't really see myself eating much of it that way. After I paired it with the dried pineapple I was surprised how much less sweet it seemed. Even though pineapples are a sweet fruit the acidity from the citrus really seemed to mute the sweetness of the mousse. The pineapple cups were a little chewy and I loved that next to the melting smoothness of the mousse.

Don't forget that this month's challenge is a competition! Browse around and see what some other creative souls from the Daring Bakers have come up with and make sure that you vote for your favorite from April 27th to May 27th at http://thedaringkitchen.com! And if you'd like to try it, find the challenge recipe here!

Saturday, April 23, 2011
Coffee Cake (not Coffeecake) With Chocolate Icing

For Hey, Babe's birthday we were planning on having a party with his family that, due to various illnesses that bounced between households, never actually happened. Because of that, I am really glad that I decided last minute on his actual birthday to whip together a cake for an intimate family celebration after dinner. Plus, even though Hey, Babe isn't a dessert person I know that Little Man was looking forward to singing to Daddy and eating some CAKE!

When I was scanning through some recipes I knew I didn't have a lot of time, which meant that the recipe had to be very simple. It also couldn't be a chocolate or a vanilla cake since I already had two layers of chocolate cake in the freezer for the coming weekend party and he doesn't care for vanilla. After flipping through some books I decided to Frankenstein a few recipes and came up with this one. I used the recipe for Boiled Milk Frosting that you can find here, choosing to make the chocolate version (add 1/4 cup cocoa powder) that was given as an alternate option.
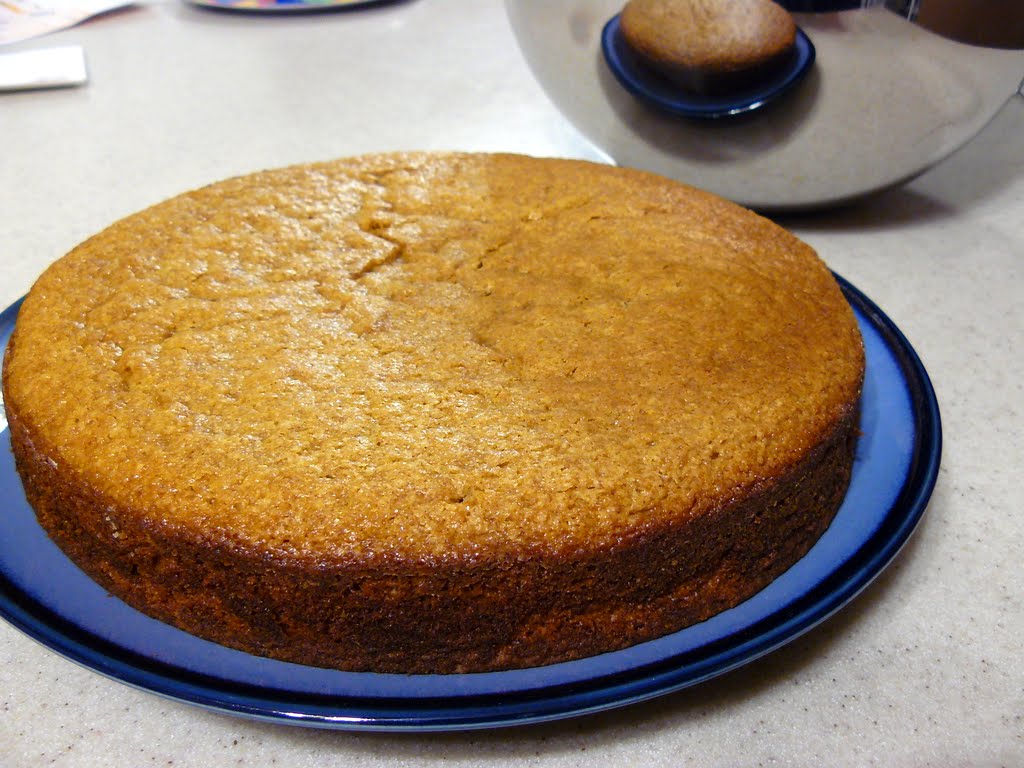
The cake came together quickly and easily. It was a very tasty cake, and had it not been for the added icing it would have been a very simple, every day sort of snack cake. It isn't often that I have a coffee flavored cake and for that reason alone I'd have made it again, but for a cake that was cobbled together from several recipes (mostly Dorie Greenspans Cinnamon Squares
Quick Coffee Cake
Ingredients
1 3/4 cups Flour
1 cup Sugar
2 teaspoons Baking Powder
1/4 teaspoon Salt
3/4 cup Whole Milk
1 tablespoon Instant Coffee Granules
2 Eggs
1/2 teaspoon Vanilla Extract
10 tablespoons Butter, melted and cooled
1 recipe Boiled Milk Frosting (your choice of flavor) optional
Instructions
Preheat the oven to 350°F and grease and flour either an 8-inch square or 9-inch round cake pan.
In a large bowl combine the flour, sugar, baking powder, and salt. In a large Pyrex measuring cup measure out 3/4 cup of milk and add 1 tablespoon (or more if you'd like it a bit stronger flavored) of coffee granules. Stir to dissolve. Whisk in the eggs and vanilla.
Working quickly but gently, stir the wet ingredients into the dry ingredients just until they are combined. Use a spatula to carefully fold in the cooled melted butter until you have a smooth batter.
Pour batter into prepared pan and bake 35 minutes or so until a knife or toothpick inserted in the center comes out clean. Allow to cool at least 10-15 minutes before removing from pan. If you plan on icing it be sure to cool the cake completely first. Enjoy!
Wednesday, April 20, 2011
Pizza Hut Style Pepperoni Pan Pizzas

Wow, that's a lot of P's. The salad pizza I showed you last time would be considered rather healthy by most standards, make it with a whole wheat crust and low fat dressing and you'd be golden. Especially when you look at that pizza in comparison to this pan of greasy, salty goodness. Now, just like with my children (or my appliances) I don't love one more than the other, I just love them differently. A nice slice of pizza is welcome any time in my book, be it breakfast, lunch, dinner, snacktime, or even sometimes in the middle of the night. If I am hungry I'll never turn my nose up at pizza. To Hey, Babe's amazement I'll eat it cold from the fridge just as happily as hot from the oven.

All that being said, there is something wonderful about getting your own personal pan of pizza that you are not going to be expected to share and you can top however you wish. Hey, Babe and I are nearly always in agreement over pizza toppings (thank goodness!) and if the topping in question is pepperoni Little Man is on board as well. These all ended up being the same but still, we each had our own. When we make these pizzas Little Man loves that he gets to smoosh out his own pizza dough and I just love how soft and tender the thick crust is.

We haven't reached the stage where we need two batches of this dough to feed us, so instead of just making 2 9" pizzas and splitting them up, I make the two it calls for plus a smaller third one for Little Man which results in slightly thinner (but still incredibly tasty!) pizzas. Honestly, a whole 9" pizza is a bit much and we end up with leftovers for lunch (yay!). This could easily serve 4-5 people, especially if accompanied by a salad. When I am making Little Man's pizza, I use one of my Pyrex Storage Bowls

This recipe was originally from a Cook's Country magazine, and in light of Hey, Babe's refusal to bring home "normal" pizza from work I tried it right away. I had high expectations and was thrilled to have them met. Since I don't quite have the sauce right I can only recommend that you use your favorite homemade or jarred tomato sauce, and feel free to mix up the toppings. Keep in mind that this is a greasier pizza than one cooked on a pizza stone and so is is a bit less healthy. Knowing that, I comfort myself with the fact that all the ingredients are relatively wholesome and that there are no chemicals or soy. Go ahead and try it. You know you want to.
Pan Pizzas
Ingredients
Dough:
2 tablespoons oil, plus more for the pans
1 cup milk, warmed to 110 degrees
2 teaspoons sugar
2 2/3 cups all-purpose flour, plus extra for counter
2 1/4 teaspoons instant yeast
1/2 teaspoon table salt
1/2 teaspoon garlic powder
Topping:
1 1/3 cups for favorite prepared pizza sauce
3 cups shredded part-skim mozzarella cheese
Toppings of your choice (pepperoni, sausage, chopped veggies, etc.)
Instructions
1. Evenly coat each of two 9-inch cake pans with a generous portion of oil, about 1-2 Tablespoons a piece.
2. In a large glass measuring cup, combine the warmed milk with the sugar and 2 TB of oil. To the bowl of your mixer add flour, yeast, and salt, mix just to combine. Attach your dough hook and on low speed slowly start adding the wet ingredients. Increase the speed to medium-low and keep mixing the dough for about 5-6 minutes until is is smooth (if you are doing this by hand you will need to knead around 10 minutes or so). Shaped the dough into a ball and leave it covered in a warm place until it has doubled. This should take about 30 minutes depending on how warm a place you leave it. I often allow my oven to preheat to around 100°F and then turn it off to let it rise in there, or I put it in my laundry/boiler room which is around 80°F at any given time, it takes a little longer to rise in the boiler room.
3. Lightly flour your counter and taking half of the dough, roll it into a ball. Flatten it into a largish disk and then transfer it to the oiled pan, using your fingers to gently press it evenly to the edges. If at any point the dough you are working with starts to get tough and uncooperative, switch to the other piece and allow the first to rest a little. Cover the pans with plastic wrap and let them rise in a warm place about 20 minutes. Don't use your oven this time because you are going to need to start preheating it to 400°F.
4. After the dough has risen, start assembling. Divide the sauce, cheese, and toppings evenly over the tops of the pizzas to within a half inch or so of the edge. Bake until the cheese is melted and your pepperoni (if you used any) is browning around edges, about 20 minutes. Let the pizzas rest in pans for 1 minute after removing them from the oven before taking them out of the pan and serving them.
Monday, April 18, 2011
Salad Pizza

During the first few years of our marriage, Hey, Babe worked as a manager for a fast food pizzeria. Considering that it was the same place he had worked for all through high school and had returned to it for a few years after college while we were waiting for me to graduate and get married, it is no wonder that he had long since tired of their food. I found this rather frustrating since it would have been quite convenient if he had been able to bring dinner home on the nights I didn't feel like cooking. Especially considering Pizza is one of the foods I love and can eat over and over again in nearly any configuration.

One of the only ways Hey, Babe was willing to accommodate me was to on rare occasions bring home a not-from-the-menu salad pizza. He and his brother had worked at the pizzeria together through high school, and upon tiring of all the heavy, greasy, salty pizzas readily available, they began instead to create various versions of this salad pizza when hunger struck them. The salad bar and various pizza toppings available made it quite easy both to assemble and to switch up the ingredients by making it spicy, or with chicken, or bacon, etc. It wasn't always the same exact ingredients, but it was always good.

I know this is another pizza recipe and I have posted several already, but since pizza is so awesome can you really blame me? It really is one of my favorite things and because you can change up the toppings so drastically you never have to eat it the same way twice. Coming up soon...Pepperoni Personal Pan Pizzas.
Salad Pizza
Ingredients
1 lb or so of your favorite pizza dough (I've even used this No Knead Dough)
4 oz. Cheddar Cheese
4 oz. Mozzarella Cheese
1/4 - 1/2 cup Creamy Dressing (we use Ranch, but Italian or Caesar could work too)
1 Red Onion, diced
4 cups Romain Lettuce, thinly sliced (you could also do spinach, iceberg lettuce, etc.)
2 small Tomatoes, chopped
2 Carrots, thinly sliced or grated
1 Bell Pepper, chopped
1 Cucumber, chopped
Optional Ingredients
Cooked Chicken
Bacon, Chopped
Hot Peppers
Olives
Sausage, Chopped
Instructions
Preheat oven (and pizza stone if you have one) to 450ºF.
On a piece of parchment paper, roll out your pizza dough into a circle of your desired thickness. Sprinkle cheddar over the dough followed by mozzarella both to within an inch or so of the edge. The mozzarella is less likely to burn and should go on top of the cheddar. Place on preheated pizza stone and bake 12-14 minutes or until crust is golden brown and the cheeses are melty and starting to turn golden.
There are now two ways you can assemble this. The first is to mix all the remaining ingredients, including dressing and your selection of optional ingredients into a bowl, toss them together and then spread them evenly on the pizza. This works fine but then you get a big bowl dirty and you chance there being an uneven distribution of ingredients. Instead, I usually spread some of the dressing on the top of the cooked pizza and then start layering the ingredients on, scattering them evenly over the top sometimes finishing with a little more derssing. It's your choice. Either way, slice with a pizza cutter and serve it warm.
Subscribe to:
Posts (Atom)