Showing posts with label cookies. Show all posts

Saturday, April 16, 2011

Baking Tips Part 1: Cookie Shaping


When I first started baking I learned the hard way that you should read through a recipe and make sure you are certain of two things: first, that you have all the ingredients, and second, that you understand all the instructions.  The worst time to realize you aren't sure of either of those items is when you are halfway into making a recipe.  Along the way I have picked up some various other tips and tweaks that I regularly apply to my baking and for this half I'd like to touch on shaping the cookie dough.

Something else I learned early on is that I am a lazy cook when it comes to certain steps, especially when it comes to shaping cookies.  Here are a few things I routinely do to make my cookie baking easier, faster, or less messy than the instructions call for.  There are several ways of shaping cookies and I find that they fall under two tiers, the first tier being the simpler. If I were to list them in order of preference based on ease of assembly they would be:


   First Tier-
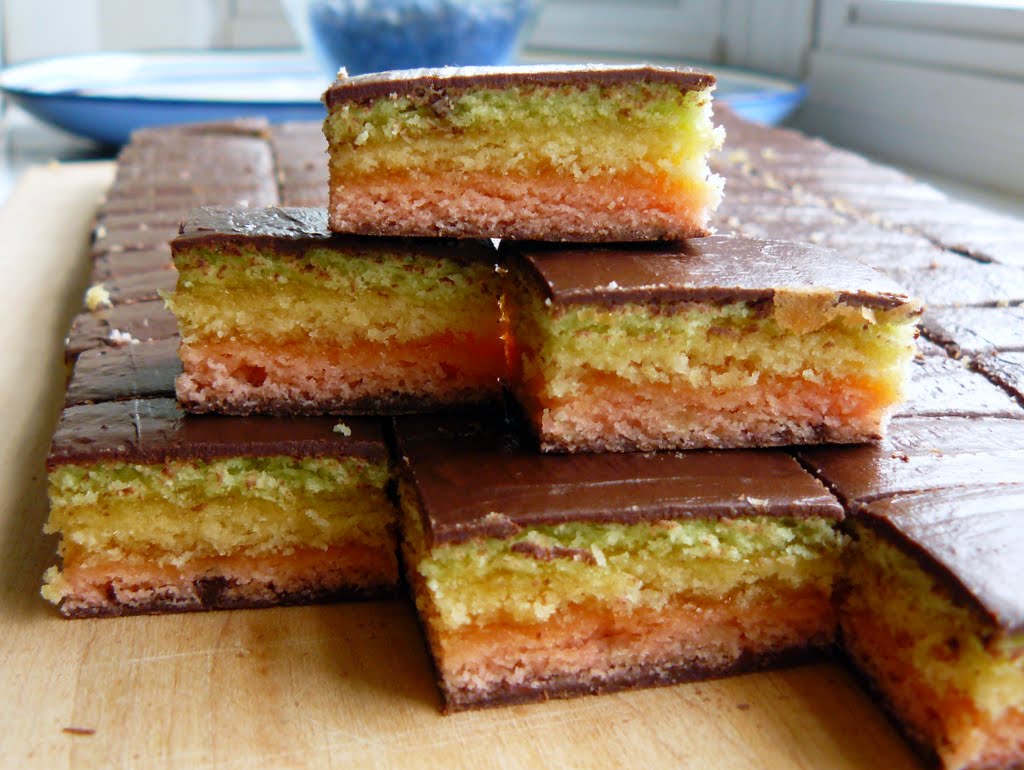
  • Bar Cookies- By far the easiest and least fussy method.  Plop the dough into your prepared pan and smooth it out using a spatula, your wet/greased hands, or a piece of wax paper.  Wonderful in that you do not have to babysit the oven, turning trays and switching trays and putting a new tray in, but it will take a bit longer to cook so your instant gratification is reduced.

  • Drop Cookies-  One of the more common methods, perhaps even the most common.  I bought three sizes of cookie scoops (1 tablespoon, 2 tablespoons, and 3 tablespoons) and no longer dread gooey fingers or uneven sized cookies that lead to overdone and underdone cookies on the same tray.  Easy to assemble but you need to babysit the oven, filling trays and switching them around. (Along these same lines are thumbprint cookies which are drop cookies that have been indented, usually with your thumb, and then filled.)

  • Rolled into a ball and flattened-  This is where you divide the dough into even little balls of a determined size or number before using your wet/greased/floured hand or the bottom of a floured/sugared glass to press them into thinner flat disks.  Previous to buying my cookies scoops I didn't like this method much as it sorely tested my patience when it came to getting all the balls to be even.  Now I use my cookie scoops to plop them out all the same size without a bit of hassle.


   Second Tier-
  • Slice and Bake- Here you take the entire portion of dough and shape it into a long log using parchment paper, wax paper, or plastic wrap.  It is then chilled before slicing off even thicknesses of dough and baking them.  My dough often does not cooperate.  The pitfalls of this method include: round logs turning square, square logs turning round, dough sticking to the wrapper, slices getting squashed or cut unevenly.  This works well for a nice thick dough that is well chilled but as the dough softens you run into trouble.

  • Rolled Out and Cut- Using a floured or greased surface and rolling pin the dough is rolled out to a prescribed thickness and shape before being cut into smaller portions with a knife, pastry cutter, pizza wheel, cookie cutters, etc.  Unless you cut the dough into squares you are left with scraps and the procedure must be repeated.  Each time it is repeated with subsequent scraps the uncooked dough gets a little warmer/softer resulting in a tougher finished product.  Also, you may run into dough that wishes to stick to either the rolling surface or the rolling pin and after doing so, tears when you try to move it to the baking sheet.

  • Rolled, Filled and Shaped- Like the previous method, this dough is rolled out flat and cut into smaller portions.  Those portions are then filled with some concoction and then the dough is wrapped to hold the filling in some way.  This is by far the most fastidious method and the one I am least likely to do.


About that lazy cook thing that I mentioned before.  When I am making any cookie in the second tier, 99% of the time I will switch it for a first tier method.  It makes my life simpler and makes me happy while I'm baking.  The final products are not usually drastically different from the original intent and sometimes I even prefer them.  Although I must admit, since I have never made some of the second tier cookies in their original presentation, I am only making an assumed comparison.  Sometimes I will even turn first tier cookies into the simplest form, that of the bar cookie.  It really depends on my mood and my time constraints.


I know that there are other methods of shaping cookies, and even variations on the above methods.  Cookie guns or cookies presses for example aren't anywhere on my list, but since I have never used one I can't comment.  I won't pretend that the above list is by any means complete, it is, however, complete according to the methods I typically come across.  So, what have I missed?  Would you agree with that order of ease or do you switch some around?  Are you a baker (lazy or otherwise) with any tips to share?

Sunday, February 27, 2011

Daring Bakers make Panna Cotta and Florentine Cookies

The February 2011 Daring Bakers’ challenge was hosted by Mallory from A Sofa in the Kitchen. She chose to challenge everyone to make Panna Cotta from a Giada De Laurentiis recipe and Nestle Florentine Cookies.


All month I have been putting off making this challenge for the simple reason that I didn't want to be the only one to eat it.  Hey, Babe isn't really big on dessert (so he claims) and insists that he pretty much just sticks to cookies.  Since the deadline for the challenges was very helpfully coinciding with our plans to visit my family, I was pleased to started whipping everything together.  I hadn't anticipated any trouble.  Since it just looked like a soft pudding to me, I thought it would be a cinch to make.


Actually, the Panna Cotta really was simple.  I didn't have any trouble tweaking it to make the coconut version I had visions of.  The trouble came when I tried to create a recipe for chocolate geleé.  You see, my vision included a chocolate geleé layered with creamy coconut Panna Cotta and served with a crispy almond Florentine cookie alongside.  Things didn't quite turn out the way I had planned.  The chocolate geleé never actually set, which I discovered as I was ready to pour my assembled Panna Cotta into the dishes.  On top of that, Hey, Babe became miserably ill with his second stomach virus in a month while I was in the middle of preparations.  It turns out that I won't be having anyone to share my incredible dessert with after all since we did not feel inclined to spread the plague to another household and opted instead to stay home. 


At the last minute I poured my coconut panna cotta into two large bowls and only one of the prepared glasses with the chocolate not-quite-geleé.  Since the one I poured into the glass didn't really layer nicely I feel it was a wise choice.  The chocolate not-really-at-all-geleé-now-that-I-think-about-it I simmered in a pot until it became a much thicker chocolate sauce.  Tasty, but not what I had planned.  The combination between the two was absolutely perfect.  The bitterness of the chocolate subdued the sweetness of the panna cotta and danced together with the coconut in perfect harmony.  It was exactly as I had hoped.  The Florentine cookies added a pleasant crumbly crunch to an otherwise silky smooth experience and all in all I am completely satisfied with the results.  The only shame was the lack of any appreciative audience to share it with.


To the given recipes I made the following changes:
-Substituted 1 can (2 cups) of coconut milk for the 1 cup of milk and 1 of the cups of heavy cream
-Substituted sugar for the honey (I wasn't sure how strong the coconut flavor was going to be and so I didn't want to take any chane that the honey would distract from it)
-Added 2/3 cup of chopped almonds to the cookies
-Substituted almond flour/meal for the all purpose flour (I think it made them quite crumbly but I liked them that way)

Thursday, December 16, 2010

Pumpkin Cookies with Cream Cheese Icing, week 12


I'm so sad.  This is the last week of us all baking new Christmas Cookies and sharing with one another.  I have really been enjoying the excuse to try several new and different varieties that I've had my eye on for a while.  For today's cookie I decided to go once again with pumpkin.  I have never tried a plain pumpkin cookie, whether it be one I've made myself or otherwise, but the idea sounded so appealing that I wanted to give it a shot.  While I was looking for inspiration for a recipe, I flipped through my Baking Illustrated cookbook and came across a recipe for chewy Sugar Cookies. Thinking that this recipe might be a good starting point I decided to whip up a batch as written to see how well it might be converted into a pumpkin cookie.  I was a bit disappointed in the results, the cookie wasn't quite what I had hoped for.  It tasted good (there are none left) but it wasn't going to fit the bill, not even as a base.

(pumpkin puree before cooking)

Looking for new inspiration I decided to do an online search.  It seemed that most of the recipes that were turning up would turn out a soft, pillowy, muffin top of a cookie.  This still wasn't what I was looking for.  Until I came across a recipe on Erin's site.  She describes typical pumpkin cookies as looking "more like an orphaned whoopie pie half" which is very apt.  However, she also stated that an error in forgetting to cream the butter and sugar together corrected this problem in her pumpkin cookies.  Another source, guilty kitchen, used pumpkin butter instead of plain puree to eliminate the fluffiness of her pumpkin cookies.  I decided to combine both of these ideas into a recipe of my own to see how it would turn out.

(pumpkin puree after cooking about 30 minutes)

While I was making the cookies I wondered if they should have an icing or glaze like there was on several of the recipes that my search turned up.  One of them made a browned butter icing and another had a cream cheese icing, since both sounded delicious I combined them into a browned butter cream cheese icing.  The result fell a bit short of my expectations, next time I am just going with the cream cheese icing (reflected in the recipe below, if you want to try it with the browned butter the only change is to brown the butter before adding the cream cheese).  These cookies were not cakey, so I successfully avoided that, but neither were they chewy or crunchy.  They tasted like a cinnamon roll mixed with a slice of pumpkin pie and then injected into a cookie.  While that isn't at all what I was anticipating, I am not about to complain about the mouthwatering little morsels on my plate.  Overall, I am very pleased with how my experimenting turned out.


Pumpkin Cookies with Cream Cheese Icing
Ingredients
15 oz. pumpkin puree (alternately, substitute about 1 cup of good pumpkin butter for this and the 1/4 cup of brown sugar)
1/4 cup brown sugar
2 sticks butter, softened
1/2 cup brown sugar
1/4 cup granulated sugar
1 egg
1 teaspoon vanilla extract
3 cups flour
1 tsp salt
1/2 tsp baking soda
1/2 teaspoon baking powder
1 tsp cinnamon
1/2 tsp freshly grated nutmeg
1/4 tsp cardamon
1/4 tsp ginger

Instructions
In a small saucepan over low heat, combine pumpkin puree and 1/4 cup of brown sugar.  Keep cooking, stirring often to prevent sticking and burning, until the puree becomes quite thick and has reduced in volume by about 1/2, about 30 minutes.  Allow to cool before proceeding.

Meanwhile, measure into a medium bowl all the dry ingredients (flour through ginger) and stir to mix.  Set aside.

Preheat oven to 350°F.  When pumpkin puree has cooled, add it to the bowl of your mixer along with the butter, sugars, egg, and vanilla, stirring only to combine.  Add the dry ingredients, mixing until no visible flour remains.

Using a 2 tablespoon cookie scoop, measure out portions of dough on a cookie sheet.  Using your palm which has been moistened with water (or the flat bottom of a glass or measuring cup) press down to flatten each mound of dough.  These cookies will not spread and flatten much on their own so squish them to your desired thickness.

Bake in the preheated oven for around 12 minutes, being sure to switch the pans halfway through for even cooking.  Cool on the pans a few minutes before removing to a wire rack.

Cream Cheese Icing
Ingredients
2 cups confectioners' sugar, sifted
4 tablespoons unsalted butter, softened
3 tablespoons cream cheese, softened
1-2 tablespoon milk (until desired consistency)

Instructions
In a small bowl, whip together the softened butter and cream cheese.  Stir in the powdered sugar.  Add the milk a little at a time until you have reached your desired consistency. Spread or drizzle on each cookie depending on thickness of icing.


Please be sure to check out everyone's entry for the final week of the 12 Weeks of Christmas Cookies!

Friday, December 10, 2010

Rugelach Four Ways, week 11

"Christmas is coming and I am getting..." heh heh, oh wait.  Wrong words.  Although with all the cookie baking going on around here you never know, it might be more accurate.  Rugelach.  An incredible, pastry-like cookie that is both delicate and flaky, with each one wrapped around itself into an elegant crescent shaped morsel of delight.  For the most part the only Rugelach I have ever eaten are the ones Mom would pick up once in a blue moon when she would head to SAMS Club for a bulk shopping trip.  I was hooked after my first bite.


These were surprisingly easy to make.  I had always thought that such an elegant cookie would be incredibly finicky to assemble and I am so pleased that I was wrong.  Of course I'm kicking myself for putting off making these for so long, but I do that often so that's nothing new. 


Although I knew that I wanted to make these Rugelach, I had no idea what I wanted to fill them with.  I know that several recipes call for fillings of a mixture of sugar, chopped nuts, and chocolate chunks but I wasn't sure that was the direction I wanted to head in.  I browsed my fridge and cupboard and saw that we had a jar of Strawberry Jam, Apricot Preserves, Chocolate Chips, leftover Cranberry Sauce, Walnuts, and Nutella.  I knew that with all those options it wasn't going to be easy to pick just once, and since the dough gets divided into four parts I decided to make four different flavors.


Apricot, Strawberry, Cranberry-Walnut, and Nutella were the four I settled on.  It wasn't until after I started spreading the cranberry sauce on the first round of dough that I remembered the apricot preserves were designated for another recipe and that there wouldn't be any to spare for this one.  No problems there, I planned on making either a second Cranberry-Walnut or a Strawberry one sprinkled with mini chocolate chips, depending on how the cranberry turned out.  I changed my mind at the last minute after tasting how wonderful the strawberry and nutella fillings tasted together (they had combined on the pizza cutter and I couldn't resist). 


A few tips if you make this recipe.  Make sure you use parchment paper on the cookie sheet or you are going to have a hard time removing them without breaking them.  My first batch stuck pretty firmly to the pan, but I learned my lesson and the remaining three did fine on the parchment paper.  Do not use strawberry jam, or I should say, if you choose to use it be prepared for it to ooze out all over the parchment paper (you will be very glad for the parchment paper at this point) and turn into a rather interesting strawberry caramel of some sort.  It didn't seem to have a very strong flavor either, I may have had better luck with a homemade strawberry puree of some sort.  Definitely go for the Nutella.  If you don't like Nutella, that's fine.  Make them with it anyway and I'll let you know where to mail them.


Finally, grease and flour your counter where you will be rolling these out. What?  The counter? Yeah, you read that right.  I'm going to post (hopefully over the weekend) about a few cookie tips and I will talk more about this then.  You don't have to grease and flour the counter, you could just flour it, but it seems to stick so much less if you do both.  (The real last tip is to actually make them instead of waiting months or years like I did.)


Rugelach
A bit of Dorie Greenspan, a bit of Ina Garten, and a bit of me
Ingredients
For Dough:
2 cups all-purpose flour
1/4 cup granulated sugar
1/4 teaspoon salt
8 ounces cream cheese cut into small pieces
2 sticks unsalted butter, diced into small pieces

For Filling:  (I didn't measure this is an estimate.  Feel free to add more or less to taste, or make additions of such things as cinnamon, allspice, cardamom, etc. to the fillings)
scant 1/4 cup of selected filling per round of dough it is to be used on (Nutella, Cranberry Sauce, Apricot Preserves, Raspberry Jam, etc.)
1 egg beaten with 1 tablespoon milk for egg wash
coarse sugar to top

Instructions
Measure flour, sugar, and salt into your food processor.  Add the diced cubes of butter and cream cheese and process until it looks like large curds (do not process until it comes into a ball or it will be over mixed).

Divide the crumbles of dough onto four separate pieces of plastic wrap and press them each into disks.  Wrap each piece and chill in the fridge at least 2 hours or overnight.  When dividing the dough I found it worked best for me to use my kitchen scale in this manner: Place a bowl on the scale and balance to zero.  Dump the contents of your food processor bowl into the bowl on the scale and read the weight of the dough.  Divide that number into four.  Reset the scale to zero and remove a quarter of the dough, which will be reflected in negative numbers of the scale, and place on a piece of plastic wrap. Reset to zero again and repeat for each quarter.

When ready to assemble, preheat oven to 350°F.  Put about a tablespoon of oil (or less) on your countertop and spread into a very thin later.  Sprinkle flour on top of the oiled spot and using your hand, spread the flour out well.  Alternately, you can just flour the counter but I find the previous method works better.  Roll out each ball of dough into a 9-12 inch circle.  Spread your selected filling over the dough, leaving a slight perimeter bare.

Using a round wheeled pizza cutter, cut the circle into even wedges, I chose 16 since it is easier but you may also do 12 for larger cookies.  Starting with the bare outer edge, roll each piece up and place on a parchment lined cooking sheet.  Chill for 30 minutes.

Brush each cookie with the egg wash and sprinkle with coarse sugar.  Bake each tray 15 minutes or until light golden brown.  Cool on a wire rack.

Makes four dozen or so depending on how you divide your rounds.


Check out what everyone else is serving up! Remember, next week is the last week before Christmas so you'd better start baking!  Week 11 of the Twelve Weeks of Christmas:

Friday, December 3, 2010

Oatmeal Cookies, week 10

I had plans of making a delicious and slightly healthier version of a standard Chocolate Chip Cookie today.  I have made it once before and thought to tweak the recipe a bit to make them just right.  Unfortunately, when it came time to assemble I had no idea what proportions I had combined last time.  Somehow I lost my notes (wait, did I make notes?) and so I had to start over, otherwise known as wing it.  They did not come out as planned.  Instead of chewy and delicious cookies they turned into little free-form Chocolate Chip muffin-type things.  Tasty, but not quite right.


Instead I bring to the cookie platter some delicious Oatmeal Cookies.  Crunchy on the outer rim, soft and chewier in the center.  Instead of the typical cinnamon, this recipe calls for nutmeg which apparently adds the spice you look for in an oatmeal cookie without overwhelming the flavor of the oats.  All in all, a classically simple and delicious addition to your standard Christmas Cookies.


Since I still had the dough from the cookie experiment last night sitting in the fridge in my mixing bowl, and since it was now a solid immovable mass I decided to make these by hand.  This of course meant that I would have to really let my butter soften to "room temperature", a rather relative term considering how chilly my kitchen was.  We intentionally keep the thermostat low (compared to most households) figuring that we can put on a sweater or (hopefully) move around and warm ourselves up.  Of course, this often backfires as I just want to curl up under a blanket with the kids.  Baking projects are therefore an excellent way to warm things up around here (which then creates even more of a need to get moving).  All of which is besides the point.


Instead of waiting for hours (days?) for the butter to soften in my cold kitchen, I decided to preheat the oven to around 100°F and let the butter sit in a glass bowl there for the 10-15 minutes it was going to take for Little Man and I to get everything else together and the dry ingredients mixed.  This worked very well.  The butter wasn't melted and liquidy, but it was nice and soft.  Just right to use my potato masher and a little bit of muscle to mix it all up.


Some people prefer their oatmeal cookies plain (me), others prefer them with raisins (eww, why?), or butterscotch chips (my mom), or chocolate chips (okay, also me), or craisins (has possibilities), etc. etc.  Oatmeal cookies are such a blank canvas and feel so wholesome because of the oats (just forget about the butter and sugar, okay?).  Take this base and change it up at will.  Add in your favorite goodies whether they are nuts or dried fruit, or even replace some of the flour with some cocoa powder.  Switch the nutmeg back to the standard cinnamon if you like (or don't.  I liked them just as much this way).  Whatever you do, don't forget to scoop out a couple of balls of dough and freeze them (like I explained here) to save for later. You know, after your guest have eaten the cookie platter clean.


Oatmeal Cookies
adapted from Baking Illustrated
Ingredients
1 1/2 cups flour
1/2 teaspoon salt
1/2 teaspoon baking powder
1/4 teaspoon ground nutmeg
2 sticks softened butter
1 cup brown sugar (it says light, I used dark because it's what I had)
1/2 cup granulated sugar
2 eggs
3 cups old fashioned oats
1 1/2 cups raisins, chocolate chips, butterscotch chips, chopped nuts, craisins, etc. etc. (you get the idea.  Or not, your choice)

Directions
1. Preheat the oven to 350°F.  In a small bowl, mix the dry ingredients, flour through nutmeg.  (Leave the oats separate).

2. In a large bowl, use your mixer to beat the butter until it is creamy (or use a potato masher and your muscles to beat it into submission, if you feel like you have to earn these cookies).  Add the sugars and keep mixing until they are thoroughly combined and fluffy.  Mix in the eggs one at a time, beating well after each.

3. Using a sturdy spoon, mix the dry ingredients into the creamed butter starting with the flour and then adding the oats after the flour is combined.  If you are adding any extras in, mix them in a the same time as the oats.

4.  Use a 2 tablespoon (or larger) cookie scoop to portion out the dough onto your cookie sheet.  Space them around 2 inches apart to allow for some spreading.

5. Bake until the cookies are golden brown, especially the edges (the centers might not look quite done but they will be just right).  The original recipe said to bake them for 22-25 minutes which sounded terribly long for drop cookies.  I baked mine for around 12-15 minutes and they were just right so maybe I just made them smaller then I thought or my oven runs hot (I've never noticed that before though).  Use your best judgment.  Let the cookies cool on their cookie sheets for a few minutes before removing them to a cookie rack.


Make sure you check out what everyone else is baking up for Christmas, we only have a few weeks left!
Week 10 Twelve Weeks of Christmas:

Friday, November 26, 2010

Lemon Sugar Cookies, week 9

I knew that this week was going to be a busy one.  One top of all the standard preparations that surround Thanksgiving, we were expecting to meet my sister's future in laws who were driving in from several states away to meet our family.  Just a little added stress to the mix, at least for my Mom and sister.


With that in mind, I decided not to worry about today's cookie post.  Instead, I pulled out a ziploc bag of frozen cookie balls that I prepared months ago and popped into the freezer.  I love this technique, it enables me to make up a large batch of cookie dough all at once (including the accompanying mess) and then either cook them immediately or save them and cook them each one at a time even, whenever I feel like a fresh warm cookie.  It works wonderfully, especially in certain circumstances such as unexpected company, quick weeknight treats, or just so that you don't find yourself eating an entire double batch of cookies in one day.


These cookies are soft and almost cakey with a delicious hit of lemon, and for this batch I combined lemon and lime zest together.  If you don't flatten the dough balls (I don't) they stay softer and more cakey, if you prefer them to develop a chewier texture, flatten down the each cookie before baking it as the recipe instructs.  The original recipe calls for a glaze which I have occasionally used, but I most often serve them plain.  The glaze adds further depth to the lemon flavor since it is bound together with lemon juice instead of your typical milk.  A soft, mildly sweet cookie that is delicious any season, whether it is alongside a cup of hot tea on a cold snowy day or a glass of iced tea under an umbrella in the sun.


For freezing directions (and this is applicable to most drop style cookies, I especially like to do this with Chocolate Chip Cookies):
Scoop out balls of dough to the desired size (1 tablespoon for smaller cookies, 2 tablespoons for larger ones) and space them out very closely together on a cookie sheet so that they are nearly but not quite touching.  Place the tray in the freezer and leave until the balls are frozen solid.  After they are completely frozen, remove them and place them all in a freezer safe container, either a sealed bag or bin.  When you are ready to bake your cookies, remove the desired number from the freezer and place them on the cookie sheet spaced apart with enough room so that they may spread.  Leave the tray out until the cookies balls are mostly defrosted while you are preheating the oven.  Bake according to original recipe's instructions, being prepared to bake them slightly longer if they are not entirely defrosted.  Enjoy fresh, warm, homemade goodies whenever you like.  Restock freezer as necessary so that you don't ever run out.  You never know when you need a cookie in a hurry.

Lemon-Frosted Sugar Cookies
COOKIES:
1 cup granulated sugar
1/2 cup Butter, softened
2 large eggs
1 tablespoon milk
1 teaspoon grated lemon rind
1 teaspoon vanilla extract
2 cups all-purpose flour
1/4 cup toasted wheat germ
1 teaspoon baking powder
1/2 teaspoon baking soda
1/8 teaspoon salt
ICING:
2 cups powdered sugar
2 tablespoons fresh lemon juice
1/4 teaspoon vanilla extract
Food coloring


INSTRUCTIONS:
To prepare cookies, beat granulated sugar and butter in a large bowl at medium speed of a mixer until well-blended (about 4 minutes). Add eggs and next 4 ingredients (egg through 1 teaspoon vanilla), beating well. Lightly spoon flour into dry measuring cups; level with a knife. Combine flour and next 4 ingredients (flour through salt). Add flour mixture to sugar mixture, stirring well. Cover bowl tightly with plastic wrap; chill 4 hours or overnight.

Preheat oven to 400°.

Using a 1 TB cookie scoop dip scoop into a small bowl with some extra flour. Shake off the flour and scoop out a level TB of dough. Release dough onto cookie sheet and using a floured hand or bottom of a cup press firmly on the ball to flatten. Place cookies two inches apart. Bake at 400° for 8 minutes or until golden. Immediately remove cookies from pans using a wide spatula, and cool on wire rack.

To prepare icing, combine powdered sugar, lemon juice, and 1/4 tsp vanilla. Stir in food coloring, if desired. Spread about 2 tsp of the icing over each cookie, or place icing in a small zip-top plastic bag. Snip a tiny hole in one corner, and drizzle icing over cookies. Sprinkle with assorted sugar sprinkles, if desired.


Be sure and check out the rest of the cookies for Week 9 of the Twelve Weeks of Christmas Cookies:

Friday, November 19, 2010

Hungarian Walnut Cookies, week 8

I had intended to make and post a Kolachy recipe that I was going to try.  After having stumbled over it recently and realized that I had all the necessary ingredients  to make it, it seemed to be the perfect cookie to add to the tray this week.  The recipe called for a prune filling among other options.  I didn't have any of the options precisely, but I did have a container of prunes that was just the right amount to make my own prune butter.  Unfortunately, I managed to somehow render the prunes entirely inedible, charred as a matter of fact, in a very short period of time.  All this was done while following the recipe and letting it simmer covered.  Oh well, I know better for next time.


Since that was the last of the prunes I found myself suddenly needing to find another recipe.  I had already softened butter and cream cheese for the dough and while I cold have easily returned them to the fridge, I instead decided it was time for me to attempt to make a cookie I had first tasted in college.


One of my roommates shared these cookies and called them "Kiffles".  They were delicious.  These are one of my favorite cookies, right up there with Chocolate Chip and 7 Layer Rainbow Cookies.  Between those three I'm not sure that I could choose.  Unfortunately, due to a promise rendered to her Grandmother, my roommate was unable to share the recipe.  (I could go off on a long tangent about this practice of "secret" recipes, but I won't.  Suffice it to say that I dislike it.)  I have wanted to try to make these for years, but because of how good the secret recipe version was, I was reluctant to try and fail.  Boy was that foolish because these were at least as good as her version.  That means I could have been making my own all this time.


After reading through dozens of versions in the years since I first tried these, I had a pretty good idea of the ratio of ingredients, so the following is more or less my own.  The interesting part about these cookies is their lack of sugar in the dough.  This is because you will roll them out with Confectioners, or Powdered Sugar instead of flour.  I have had these with various fillings (apparently they can even be made savory, who'd have known?) including both apricot and a walnut filling.  I believe that walnut is more traditional and that is what I have chosen to make this time.  One last note is there seems to be some discrepancy with their name.  I first heard them referred to as Kiffles, but have since discovered that they may be called Kifli as well.  I am not sure which is more accurate, but to me, they will always be Kiffles.


Kiffles or Hungarian Walnut Cookies
Ingredients
6 ounces cream cheese
1 cup butter
3 egg yolks
1 teaspoon vanilla extract
2 1/2 cups all-purpose flour
1 pinch salt
1/2 teaspoon baking powder
3 egg whites
8 ounces ground walnuts
1 tsp vanilla
pinch Salt
1/2 cup brown sugar
1/3 cup confectioners' sugar for decoration and assembly

Directions
1. In a medium bowl, cream butter and cream cheese. Stir in the egg yolks and vanilla. Stir together the flour, salt and baking powder. Add the flour mixture a little at a time until it is fully incorporated. Roll walnut sized pieces of dough into balls (I used a 1 tablespoon scoop) and place on a cookie sheet that is lightly dusted with powdered sugar.  Lightly dust the tops of the dough and place in the fridge, covered, for at least 1 hour.

2. In a medium bowl, beat egg whites until foamy, add the sugar, salt, walnuts, and vanilla.  Set aside.  On a surface lightly floured with Powdered Sugar, roll a ball of dough out to 1/8 inch thickness. (Add more sugar as needed to prevent sticking.

--For smaller cookies: Roll into an oval, cut the oval in half through the skinny middle and place a small amount of filling a bit off center.  Fold the dough over the filling and seal.  Twist of the sides and set on a cookie sheet, pulling the sides towards each other to form a crescent.

-For larger cookies: Roll into an oval/circle and place a large amount of filling in the center.  Roll up the dough around the filling in the same manner as for small cookies, twisting the sides and placing the cookie in a crescent shape.


3. Preheat oven to 350°F. Bake cookies for 8 to 10 minutes for smaller cookies or 10 to 12 minutes for larger cookies, until lightly browned. When cool, dust with powdered sugar before serving.


Don't forget to check out the other entries for this week!
Week 8 of the Twelve Weeks of Christmas:

Friday, November 12, 2010

Chocolate Toffee Butter Cookies, Christmas Cookies week 7

When I first saw this recipe in Cook's Country, it was four years ago.  I thought to myself then that it would make a lovely Christmas cookie and decided I should make it.  It didn't happen that year or any other since, until now.  This countdown of Christmas Cookies has inspired me to make a few cookies that I have long wanted to try but haven't because I get caught up in the bustle of the season.  What usually happens to my grand plans for making a dozen varieties of Christmas cookies is they whittle down to only two or three varieties which are mixed up at the last minute.  I am, if nothing else, an expert procrastinator.  (I once started reading an article about procrastination, only to put it down planning on finishing it later.  I never did get back to that article.)

The instructions for these cookies said that I should split the dough in half, rolling each half into a log before refrigerating them.  I am always looking to shortcut the process of recipes, especially now that I have two little ones whose needs often interrupt my forays into the kitchen.  If a recipe calls for rolling out cookie dough and then cutting it, I turn it into a slice and bake cookie, if it is a slice and bake cookie, I turn it into a drop cookie like I did with these.  I used my cookie scoop to portion out balls of dough and then using the floured bottom of a glass to flatten each of them into a round.  This worked marvelously.


The cookies turned out quite a bit larger than I had expected.  Perhaps this was because I skipped the step of chilling the dough, but I think not since my kitchen was quite chilly when I made them.  I liked that because of their size, they have different texture within each cookie.  The edges are crisp and as you reach the center it becomes more soft and chewy, encompassing the best of both worlds. 


The recipe stated to completely cool the cookies on the pan before removing them.  I found that if you left them on the pan too long (i.e. until they were completely cooled) you were going to lose some in the removal process.  To compromise, I loosened them all from the pan at 3 minutes out of the oven but left them still sitting on it to finish cooling.  If you try at 2 minutes, they will still be soft and break apart.  If you try much after 3 minutes they will have permanently bonded to your pan. Somehow in the process of mixing up these cookies, Little Man managed to get cookie dough up his nose.  After his experience I can say with some certainty that doing so is neither pleasant nor satisfying.  I do not recommend trying to eat these this way.


I managed to break my chocolate as I was trying to melt it.  I'm not sure how, one second it was fine and the next it wasn't.  I was supposed to be able to drizzle on decorative, delicate swirls of chocolate and then sprinkle on the toasted pecans.  Not wanting to waste the chocolate, which still tasted fine, or waste the last remaining minutes of nap time starting over, I used a knife to spread it on the the tops of the cookies like a frosting and then dipped them each in the pecans.  Using the chocolate and nuts so heavily on each of the cookies caused there to be a shortage and a few remained without.  The toffee flavor is so much more pronounced on these, so if you don't care for chocolate feel free to leave it out.  While I like the plain ones, I prefer the chocolate ones.  The pecans give these cookies that last little nudge over the top from really good to excellent.

Chocolate Toffee Butter Cookies
Ingredients
2 1/3 cups all-purpose flour
1/2 teaspoon baking powder
1/2 teaspoon table salt
16 tablespoons unsalted butter (2 sticks), softened
3/4 cup packed light brown sugar
1 large egg
1 teaspoon vanilla extract
1 cup Heath Toffee Bits (without chocolate)
1 1/2 cups semisweet chocolate chips
1 tablespoon vegetable oil
1 cup pecans toasted and chopped fine

Instructions
1.  In a medium bowl, mix together the flour, baking powder and salt.  Set aside.  In the bowl of your mixer, beat the butter and sugar together on medium for about 3 minutes or until very fluffy. Add the vanilla and the egg.

2.  On low speed, add half of the flour to the mixer.  After it is mixed in add the second half, mixing until the flour is no longer visible.  Stir in the toffee.  (I may experiment with adding the nuts in as well so that they aren't relying on the chocolate to hold them  to the cookie.)

3.  Preheat oven to 350°F.  Using a 2 tablespoon scoop, portion out the cookie dough about 2 inches apart onto a cookie sheet lined with parchment paper.  (Okay, them permanently adhering to the pan makes more sense.  I must have missed this when I read the recipe.)  Dip the bottom of a glass into flour and press each ball down until they are about 1/4 inch thick.  Repeat dipping in flour for each one.  (Optional: chill in fridge for about an hour before baking.)

4.  Bake cookies until just browned around edges, 10 to 12 minutes. Cool cookies completely on baking sheets.

5. Melt chocolate and mix with oil in bowl until smooth. Spread each cookie with melted chocolate or drizzle chocolate over cookies with spoon and top with pecans. Let chocolate set, about 1 hour.

note: I used a 2 tablespoon cookie scoop, ending up with 2 dozen cookies.  If you prefer smaller cookies try using a 1 tablespoon scoop but remember to check them since the cooking time will vary a bit.


Please don't forget to check out all the other submissions for Week 7 of the Twelve Weeks of Christmas:

Friday, November 5, 2010

Seven Layer Rainbow Cookies, week 6


The first time I ever had these cookies was at my cousin's bridal shower as a teenager.  A mother of one of the bridesmaids prepared them for the party and I can distinctly remember overhearing the bridesmaid say how difficult they are to make and how her mother only makes them very rarely.  It was several years later before I ever had another one.  The ice cream parlor I worked at tried a sort lived idea of selling baked goods in addition to ice cream.  Of all the things that they sold, these were what I found hardest to resist.  After they stopped selling them I once again went without.


I consider these a very festive, Christmasy cookie, probably because of the colors, and so I find it ironic that I came across them once again because of another bridal shower.  I wasn't about to complain when a co-worker brought a large platter of extra baked goods she had made for her daughter's bridal shower and included on it a ton of these.  Finally, older and wiser, I asked her for the recipe which she (thankfully!) was happy to share. 


Remembering the first bridesmaid's statement that these were hard to make, I expected to find complicated techniques or at the very least days of preparations.  While these are not the most difficult cookie to make, they are involved.  For me the trickiest part comes when you try to spread the batter evenly in the pan.  It doesn't really want to cooperate.  Since it is such a thick batter and you need to spread it out so thin on top of parchment paper, I find it a bit frustrating.  Especially if you misjudged the batter when you were dividing it.  This year I was able to use my kitchen scale to make sure that I divided the batter evenly but if you don't have one, just get it as close as you can.  Some things are just worth the effort.


Seven Layer Rainbow Cookies
Ingredients
1 can (8 oz) almond paste
1 1/2 c (3 sticks) unsalted, softened butter
1 c sugar
4 eggs, separated
1 tsp salt
1 tsp almond flavoring (extract)
2 c flour
Green and Red food coloring
1 jar (12 oz) apricot preserves
2 1/2 squares semi-sweet choc (5 oz) (choc. chips)
Waxed paper

Instructions
Preheat oven to 350°. Grease three 13x9 inch baking pans. Line with parchment paper and grease again. If you only have one pan you will have to reuse it for each layer.

Break almond paste up with fork in large bowl, be sure to break it up small or you will end up with chunks in the batter. Add butter, sugar, egg yolks, salt and almond extract. Beat with electric mixer until light and fluffy. Add flour and blend well.  In a separate bowl, beat egg whites until stiff peaks form. Stir egg whites into batter with wooden spoon using turning motion similar to folding.

Spread 1 ½ c of batter in 1st pan. Remove another 1 ½ c to small bowl and tint with green. Spread evenly in 2nd pan. Add red coloring to remaining batter and spread into 3rd pan (or divide the batter into thirds by weight, I found this to be more accurate).  I tend to go light on the coloring, but these can be as vibrant as you'd like.

Bake in preheated oven for 10 minutes or until edges are golden. Layers will be about ¼ inch thick. Immediately remove cakes from pans to wire racks to cool. I let them cool a bit in the pan then I grab the parchment paper and lift the whole thing out to completely cool.

Heat apricot preserves in small sauce pan and strain half over the green layer being sure to bring to edges. Invert the yellow layer over the green and remove parchment paper. Spread remaining preserves over this layer and then top with red layer in the same manner.

Carefully place the stack in between two of the pans, leaving parchment paper in between the cookies and the pans. Distribute several cans on the top of the topmost pan and refrigerate overnight or at least 8 hours.

After the allotted time has passed, melt chocolate in top of double boiler. Take pan from fridge and remove the top pan and sheet of parchment paper. Spread a thin layer of chocolate on top. Let the chocolate set about ½ hour. Carefully place a baking sheet on top of hardened chocolate and turn over. Now you can put more melted chocolate on this side.

When it is hard, trim the edges of the cake. Cut into rectangles or 1 inch squares. Whatever way you cut it they still taste delicious. Keep them refrigerated.


Jolinda, thank you.  I love these cookies, they are one of my favorites.  I have included them on my Christmas platter every year since you gave me the recipe.  Everyone else, try them out!  Or check out any one of the other goodies we are all baking up for Week 6 of Twelve Weeks of Christmas:
Related Posts Plugin for WordPress, Blogger...