Showing posts with label cake. Show all posts

Saturday, April 23, 2011

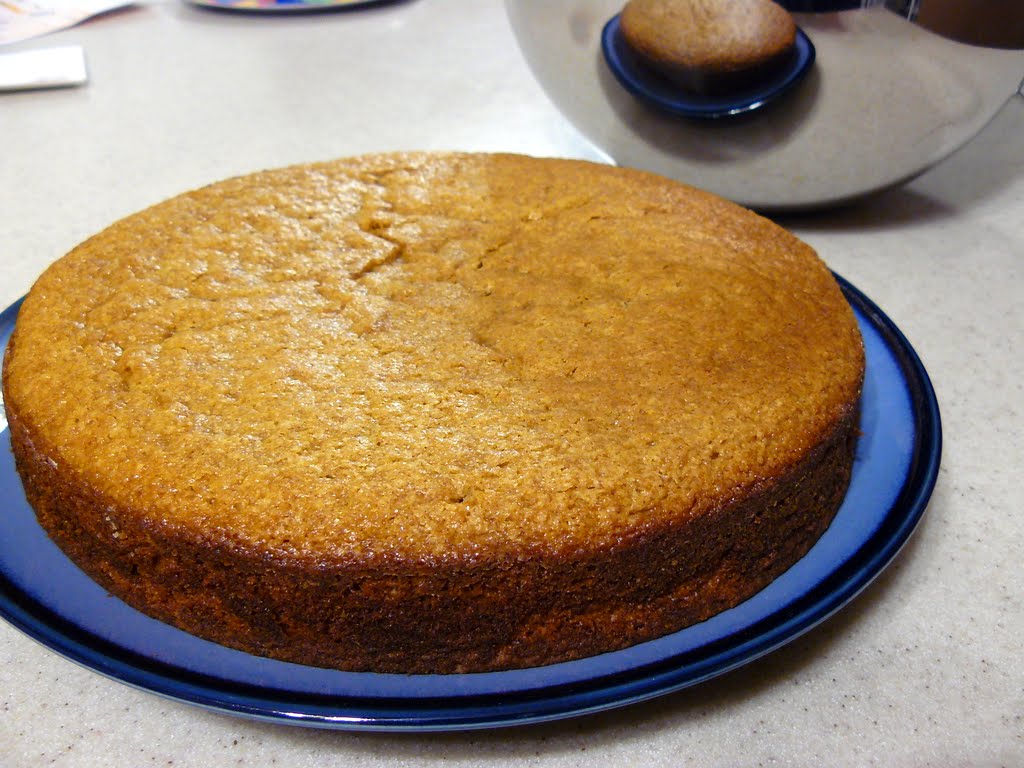
Coffee Cake (not Coffeecake) With Chocolate Icing


For Hey, Babe's birthday we were planning on having a party with his family that, due to various illnesses that bounced between households, never actually happened.  Because of that, I am really glad that I decided last minute on his actual birthday to whip together a cake for an intimate family celebration after dinner.  Plus, even though Hey, Babe isn't a dessert person I know that Little Man was looking forward to singing to Daddy and eating some CAKE!


When I was scanning through some recipes I knew I didn't have a lot of time, which meant that the recipe had to be very simple.  It also couldn't be a chocolate or a vanilla cake since I already had two layers of chocolate cake in the freezer for the coming weekend party and he doesn't care for vanilla.  After flipping through some books I decided to Frankenstein a few recipes and came up with this one.  I  used the recipe for Boiled Milk Frosting that you can find here, choosing to make the chocolate version (add 1/4 cup cocoa powder) that was given as an alternate option.


The cake came together quickly and easily.  It was a very tasty cake, and had it not been for the added icing it would have been a very simple, every day sort of snack cake.  It isn't often that I have a coffee flavored cake and for that reason alone I'd have made it again, but for a cake that was cobbled together from several recipes (mostly Dorie Greenspans Cinnamon Squares) I was quite pleased with how it turned out.

Quick Coffee Cake
Ingredients
1 3/4 cups Flour
1 cup Sugar
2 teaspoons Baking Powder
1/4 teaspoon Salt
3/4 cup Whole Milk
1 tablespoon Instant Coffee Granules
2 Eggs
1/2 teaspoon Vanilla Extract
10 tablespoons Butter, melted and cooled
1 recipe Boiled Milk Frosting (your choice of flavor) optional

Instructions
Preheat the oven to 350°F and grease and flour either an 8-inch square or 9-inch round cake pan.

In a large bowl combine the flour, sugar, baking powder, and salt.  In a large Pyrex measuring cup measure out 3/4 cup of milk and add 1 tablespoon (or more if you'd like it a bit stronger flavored) of coffee granules.  Stir to dissolve.  Whisk in the eggs and vanilla.

Working quickly but gently, stir the wet ingredients into the dry ingredients just until they are combined.  Use a spatula to carefully fold in the cooled melted butter until you have a smooth batter.

Pour batter into prepared pan and bake 35 minutes or so until a knife or toothpick inserted in the center comes out clean.  Allow to cool at least 10-15 minutes before removing from pan.  If you plan on icing it be sure to cool the cake completely first.  Enjoy!

Sunday, March 27, 2011

The Daring Bakers make Yeasted Meringue Coffee Cake


The March 2011 Daring Baker’s Challenge was hosted by Ria of Ria’s Collection and Jamie of Life’s a Feast. Ria and Jamie challenged The Daring Bakers to bake a yeasted Meringue Coffee Cake.


Holy cow was this good!  When I realized that I was going to be making this without any extra hungry people around to help me eat it (other than Hey, Babe and Little Man) I decided that I was either going to have to cut the recipe down or make half of it a savory version.  After sitting back and thinking of all the interesting filling possibilities we had in the pantry, I knew that cutting the recipe down was no longer a viable option.


I narrowed down my choices to three.  A savory pizza-like "cake" stuffed with chopped onions, pepperoni, mozzarella and herbs, and two sweet versions.  The first sweet cake had the standard chocolate, cinnamon and nut filling provided in the original recipe and the second had blueberries with a dusting of cardamom. 


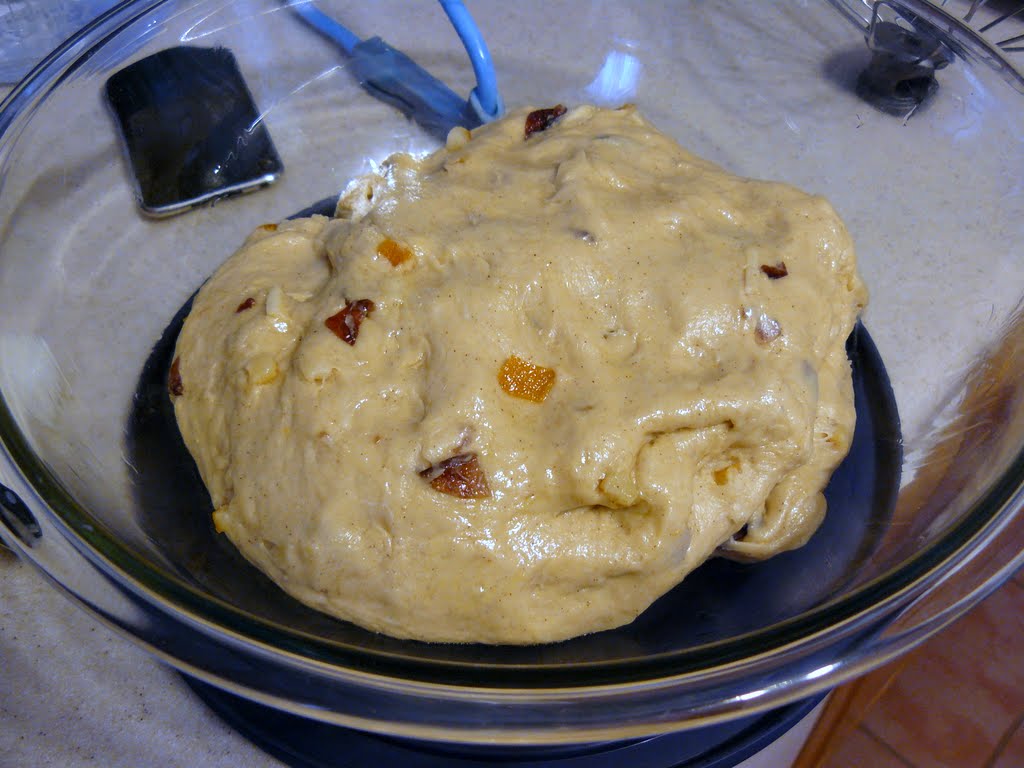
I had no trouble getting the dough to come together, the only adaptation to the given recipe that I made was to use 2 yolks instead of one of the whole eggs that were called for to eliminate the waste the meringue would otherwise have created.  I did chose to allow it to rise in the fridge overnight so that I wouldn't have to deal with it the next day, taking it out of the fridge to come to room temperature a few hours before I'd need it (we have a cold house).


When the pepperoni version was baking in the oven my mouth started watering, it smelled so tempting that I could hardly wait to try it.  It was incredibly tender and moist and I said to Hey, Babe that even if the other two version were awful I'd still make this again.  Next time I might add some more cheese, but other than that it was delicious.


After having finished dinner I was curious to see if dessert would be as good.  I tasted the chocolate version and decided it was my favorite.  Then I tasted the blueberry version and decided that it was my favorite.  But when I tasted the chocolate a second time I changed my mind again.  Can you see where this was going?  They were both so delicious I really can't say which I liked more.


This dough was so easy to work with and has so many possibilities for filling variations that I know I will have to try some more versions.  I can see cream cheese, or apples, or sausage and peppers, or broccoli and cheddar, or...I think I need to go eat something.  All those possibilities are making me hungry.


Find the challenge recipe here.

Thursday, January 27, 2011

Daring Bakers Make Biscuit Joconde Imprimes, part One

The January 2011 Daring Bakers’ challenge was hosted by Astheroshe of the blog accro. She chose to challenge everyone to make a Biscuit Joconde Imprime to wrap around an Entremets dessert.  Now, when that was announced I had absolutely no idea what it was.  All I knew was that it sounded fancy, and complicated, and, well...challenging.  Back to the challenge aspect of the group.  However, since I like desserts I was not in the least concerned about liking it, just about managing to get it completed while corralling two kiddoes.  When I read the challenge further I discovered what we were making and found out that we were suppose to come up with our own fillings.  I knew without a doubt what I was going to be making.


The very first "fancy" dessert that I ever made was a three layer chocolate mousse cake, the recipe for which I got, ironically, from a King Arthur Flour Cookbook.  I say ironic because the original recipe didn't have any flour in it, strange coming from a company that distributes flour.  The bottom was a dark chocolate flourless cake, the middle layer a milk chocolate mousse, and the top was a white chocolate-raspberry mousse.  It is one of the few recipes I have made several times because it has always pleased the crowd. 


I was all set to make and fill my Biscuit Joconde but had no idea what sort of design I was going to attempt to implement.  After a lot of consideration I went with random squiggles, which didn't quite turn out as clearly as I had hoped, but since I didn't end up with a burnt or cracking mess I figured for a first attempt it went well.  Continuing on, I assembled my milk chocolate mousse and poured it into the pan with the jaconde molded around the edge.  Uh oh!  My estimates were way off since the mousse only came to about a third of the way up the side.  I was going to need to come up with another layer. 


After some searching through various saved recipes I decided on adapting one for a caramel mousse.  Throughout the entire process it was this step that gave me the most trouble.  I needed to make a caramel sauce from scratch since I wasn't about to to go out in our very strange lightning blizzard and that was the trouble.  I have attempted caramel once before and while it was edible, it was grainy and a bit bitter/burnt and unfortunately the first batch I made for the mousse came out the same way.  I was not going to ruin a beautiful dessert by using the subpar caramel I had just produced, so I did some quick research and decided to try again.


One of the suggestions for keeping the caramel from burning was to submerge the bottom of the pan into cold water to stop the cooking process.  This sounded plausible and so I did so only to be quite dismayed when my beautiful caramelized sugar seized in the bottom of the pan and turned into rock hard candy.  Not knowing how else to remove the sugary mass from the bottom of my pan, I decided to try and melt it off over a low heat.  Eventually, the mess began to melt back into beautiful caramel and although it was a time consuming process I was able to use it for the middle layer, a delicious caramel mousse.


It wasn't until after I made the caramel mousse that it occurred to me that the caramel mousse and the white chocolate mousse were going to have a similar flavor profile.  Proceeding on with the white chocolate mousse would probably have been fine, but I decided to alter it and turn it into white chocolate-mocha.  Judging from the bits I tasted that were leftover in the bowl, I believe it was an excellent decision.

(see that clump? that is the caramel mess starting to melt again)

The mousse is currently setting in my fridge.  There are as of yet no interior pictures since we will be eating it this weekend as we celebrate two family birthdays.  I still wanted to post today since it is reveal day, and since I already had so much to blabber about I will save the interior pictures to post with the recipe later this weekend or early next week.  I thoroughly enjoyed this challenge and must thank Astheroshe for introducing a new dessert presentation to me.  Be sure to visit some of the other incredible desserts that other Daring Bakers have produced this month.  If you wish to try the recipe for the Joconde, you will find the one we used here on the Daring Kitchen website.

Monday, December 27, 2010

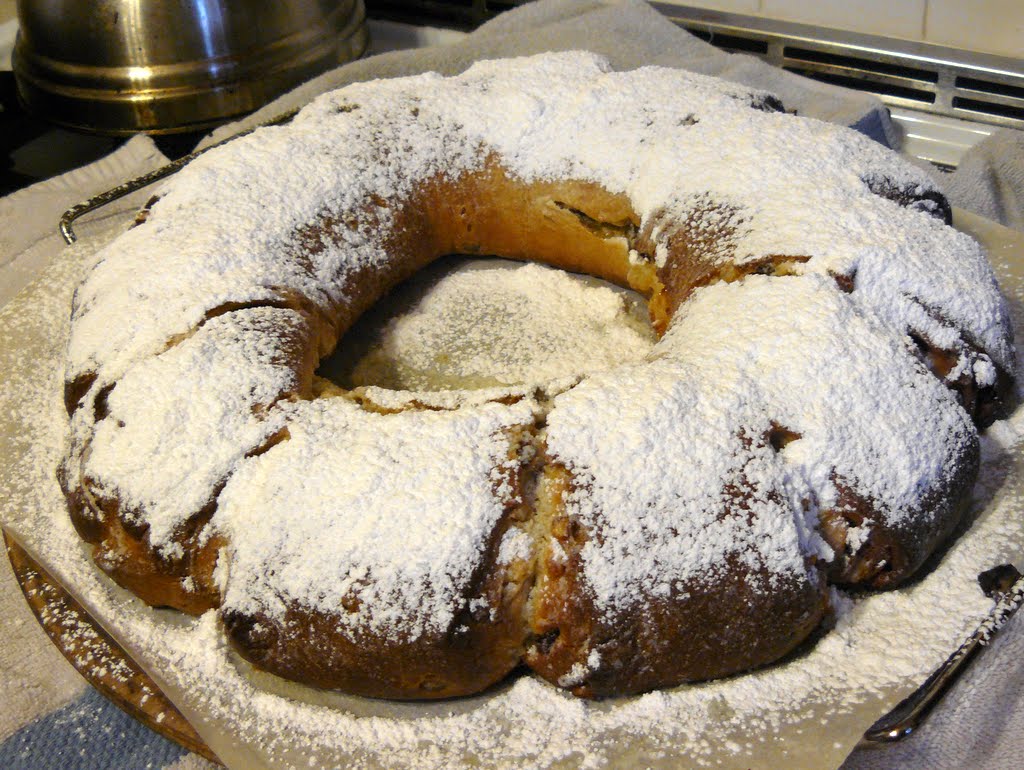
Daring Bakers Make Stollen

The 2010 December Daring Bakers’ challenge was hosted by Penny of Sweet Sadie’s Baking. She chose to challenge Daring Bakers’ to make Stollen. She adapted a friend’s family recipe and combined it with information from friends, techniques from Peter Reinhart’s book.........and Martha Stewart’s demonstration.


I have to admit that I have never tried any variety of fruitcake.  I know that there are different versions of fruitcake for different cultures, but until this challenge I hadn't tried any of them.  I was a little leery of fruitcakes in general since they are so often disdained and joked about, but I am willing to try almost anything once so I was ready for the challenge.


The first thing I decided was that I wasn't going to buy the candied fruit.  Not only was I going to make the candied orange peel, which seemed simple enough to do myself, but I was also going to make my own GlacĂ© Cherries rather than buy a package of the loaded-with-artificial-flavors-colors-preservatives-and-chemicals variety.  It wasn't until after I decided to go that route that I realized that doing so would add a week to my prep time.  Apparently making candied cherries is a slow process.  Nevertheless, I felt that it would be worth it and followed through ending up with not only a large bunch of candied cherries, which was much more than the dozen the recipe called for as optional (oops, didn't catch that part until much later) but also a pot full of mildly cherry flavored sugar syrup.  I set the syrup aside for another use (which I will talk about another day) and continued with the Stollen.


The candied orange peel was quite simple to do and I am sorry I only made two oranges worth. I used most of it in the Stollen and there isn't any more left to snack on.  Of course since it was so easy to make it will be no trouble to make another batch.  I didn't try any of them dipped in chocolate because I liked them to much the way they were to change anything.


In the Daring Bakers forums I picked up quite a few tips as to flavor variations as well as assembly, and I am quite happy with the ones I chose to implement.  For the most part I used the recipe as written, but I did make a few adjustments.  For example, raisins? Not happening in something I bake.  Raisins are okay plain, or dipped in chocolate, or mixed into a trail mix, but once you start cooking them and making them all weird and squishy I am gone.  Instead of adding the raisins I added an equal weight of my previously mentioned plethora of candied cherries (yes, I know they are also squishy, but since they aren't raisins for some reason it doesn't bother me.  I can't explain it so don't ask.)  I didn't want to lose the flavor and moisture that the rum was supposed to add with the soaked raisins but I didn't have any rum, so I just mixed an equal amount of blackberry brandy in when I was adding the chopped fruit and nuts.

One of the tips I read was regarding the mix-ins.  It was suggested that by only adding half of them during the mixing process and the remainder after the dough had risen and been rolled out, you allowed the fruit to avoid being smashed and deformed and it was easier to roll out the dough.  I followed this advice, mixing in only half of the chopped and candied orange peel, the slivered almonds, and the chopped glacĂ© cherries.  When it came time, I rolled out the dough with a little bit of flour to prevent sticking (wow, did it get big!) and sprinkled on the remaining chopped fruit and nuts.  I wanted to experiment a bit with the flavor so I added about 1/2 a cup of mini chocolate chips and about 6 oz of almond marzipan pinched off into small pieces so that it would be evenly distributed.  The dough looked very full before I started rolling it up.

I was thrilled with how this turned out.  None of the individual steps were time consuming or hard, but since some items required several days to complete this is not the kind of recipe you can start on a whim and finish in one day.  My mother in law said after tasting it that not only was it delicious but that "it is an experience."  Coming from a die hard chocolate fan that is saying a lot.  I thoroughly enjoyed the Stollen, and might not be so hesitant to try another type of fruitcake in the future.  Right now I am trying to decide between turning the last few pieces into french toast or bread pudding.  Of course, if I keep stealing tastes that will eventually become a moot point.  Thank you Daring Bakers for the lovely challenge!


Please visit the Daring Kitchen for the original recipe and don't forget to see how everyone else tweaked their version of this Stollen. Enjoy!

Monday, November 8, 2010

Homemade Hostess Cupcakes


I'm the girl who uses anyone and everyone as my culinary guinea pigs.  Hosting a party or attending a potluck? Let's try this random recipe for the first time.  It often includes tears before the dish is complete (what? I'm emotionally tied to my cooking) especially if it is a dessert.  I'm not sure if that makes me more brave or foolish.  I do know that it baffles Hey, Babe to no end.  He is constantly wondering why I profess to enjoy cooking and baking when it can bring me to tears.  The recipes nearly always turn out well in the end, it is very rare that I find something completely inedible, only once? twice? and I think both times I was only cooking for ourselves so that's okay.  I think it is this track record, combined with my recipe collecting (hoarding) obsession that encourages me to continue on in this manner.


All that being said, it is pretty much only a very good recipe that gets made more than once.  Correction, a very good dessert (non-cookie) recipe.  Savory recipes I have in a much smaller quantity and need to make for dinner nearly every night so they get reused much more often.  Similarly, cookies are more of a spur of the moment let's have something sweet and so they also get made more often.  Fancy desserts however, the cakes, pies, custards, and pastries, they do not get made nearly as often as I'd like to eat them (fortunately for my health) and so they get one attempt at perfection before I move on to the next one that has caught my eye.  So far there have been only a few exceptions, this recipe being one of them.


These cupcakes are so good that I made them several times in one month.  I made them the first time for a family gathering.  Later that night as Hey, Babe was talking with his brother on the phone, they reminisced about how good they were.  Odd since dessert is an unusual thing to come up in their conversation.  The next day we got together with Hey, Babe's sister and her family.  Her husband recalled how good these were, another unusual occurrence.  These were so good we all couldn't get them out of our heads, which is why I made them again, and then again.


When Heather announced that the theme for this month’s Sugar High Fridays was “Desserts with a Hidden Surprise,” these came to mind.  I began to consider other possibilities as well, cookies or perhaps venturing into new territory with candies.  Then I recalled that we were going to be visiting friends who had recently finished construction on their new home and that I had offered to bring dessert.  That sealed the deal.  These are exactly what I wanted to bring.  A sure crowd pleaser.  How could you go wrong with delicious chocolate cupcakes topped with chocolate Ganache?  You can't.  Especially when there is hidden within an incredible cream filling.  These are simply awesome.  It is hard for me to imagine anyone not liking these, but if you make them and it turns out you don't like them, would you do me a favor and send them to me?


Homemade Hostess Cupcakes
originally from The Food Network
Ingredients
For the Cupcakes:
1 1/4 cup unbleached all-purpose flour
2 teaspoons baking soda
2 teaspoons baking powder
1/4 teaspoon coarse salt
1 1/4 cups granulated sugar
4 ounces unsweetened chocolate chopped
1 stick unsalted butter cut into pieces
2 teaspoons pure vanilla extract
2 large eggs lightly beaten

For the Filling:
4 tablespoons unsalted butter at room temperature
1 cup powdered sugar
2 teaspoons pure vanilla exrtact
3 tablespoons heavy cream
7 oz marshmallow creme

For the Ganache:
6 ounces semisweet chocolate chopped
1/2 cup heavy cream
1 tablespoon unsalted butter
2 teaspoons pure vanilla extract

For the Icing: (I usually have leftover filling and so decorate with that, though it doesn't really hold it's shape long it saves me a step)
1 stick unsalted butter
1 1/2 tablespoons milk (or up to 2 TB)
2 cups powdered sugar
1/4 tsp vanilla


Instructions

Position a rack in the center of the oven and preheat to 350°F.  Place paper liners in muffin tin for about 20 cupcakes.  Do not skip the liners or you will not be able to nicely remove the cupcakes from the pan.  This is the voice of experience, I tried skipping this step because I didn't have enough liners and didn't want to go to the store.  I went to the store anyway (well, Hey, Babe did) and started over again and now must find something to do with destroyed cupcakes.

For the Cupcakes:
Bring the sugar and 1 cup water to a boil in a saucepan, stirring until the sugar dissolves, about 3 minutes. Pour into your mixing bowl.  To the bowl add the chocolate and butter. Stir occasionally until the chocolate is melted and the mixture has cooled slightly. Stir in the vanilla.

In a separate bowl, mix together flour, baking soda, baking powder and salt.  Using your mixer, beat the eggs into the chocolate, then mix in the dry ingredients.

Divide the batter evenly between the prepared muffin pans.  It says it should be about 1/4 cup per cupcake, but I found that using my 3 tablespoon cookie scoop was the perfect amount and gave me exactly 23 cupcakes with no batter left over.  Bake until a toothpick inserted in the center comes out clean, about 20-25 minutes. Cool in the pans for about 25 minutes, then transfer cupcakes to a rack to cool completely.  The cupcakes are going to sink in the middle, don't worry because when you fill them later they will puff up again.

For the filling:
Using a mixer, cream the butter until light and fluffy. Beat in 1/2 cup confectioners’ sugar. Add the vanilla and 1 tablespoon heavy cream; beat until smooth. Beat in the remaining 1/2 cup confectioners’ sugar and 2 tablespoons heavy cream in batches, alternating after each addition. Beat in the marshmallow creme; set aside or refrigerate.

For the ganache:
Place the chocolate in a stainless-steel bowl. Heat the cream and 1 tablespoon butter until just boiling, then pour over the chocolate; let stand for 5 minutes. Whisk until smooth. Add 2 teaspoons vanilla; let stand until cool but still glossy and liquid.

Spoon the filling into a pastry bag with a medium star tip. Insert the tip into the center of each cupcake top; fill until the cupcake is heavier (do not overfill). (It's OK if some of the filling peeks out, it will be covered by the ganache.)  I chose to insert the tip twice, once on each side, rather than just once in the center.  It worked better for me and used up more of the filling.  Be sure that the cupcakes are absolutely cool first.  If you fill them warm the filling kind of melts into the cupcakes and disappears a bit.  Again, this is the voice of experience.

Spoon a little ganache on each cupcake and lightly spread with an offset spatula or a knife. Chill for at least 15 minutes.

Meanwhile, prepare the icing: Using a mixer, beat the remaining 1 stick butter, 1/4 teaspoon vanilla, the milk and confectioners’ sugar until smooth, adding more milk if needed. Spoon into a pastry bag with a small tip (I used a #2 plain tip); pipe onto the cupcakes to decorate.

Store in the refrigerator. Make 20-24 cupcakes depending on how evenly you distribute the batter.

----------

Be sure and check out Heather's round up of all the other Sugar High Friday posts at the end of the month.  Also, you may want to check out Jennifer of The Domestic Goddess and her links to past Sugar High Friday round ups.

Sunday, October 24, 2010

Lemon Coconut Cake


Sugar High Friday has long been a favorite food blogging event of mine.  If you haven't heard of it, it was an event started by Jennifer of Domestic Goddess.  I always enjoy seeing everyone's variations on the given theme.  The recipes are so tempting and I have found myself bookmarking a ton of them.  When I saw that Allison of Zucchero Dolce had selected layer cakes as this months sugar high, I was excited.  It was no problem in my mind that there was no real world event calling for a layer cake of any kind, I wasn't going to miss my opportunity to participate for the first time.


Normally when I make a cake it is for a birthday.  For such events I choose something that falls within the parameters of the guest of honor's preference.  If they have no special request or if there is no guest of honor, then I just pick something that I feel will appeal to the largest portion of the attendees, taking into consideration such things as known aversions, seasonal flavors, etc.  While this is no hardship, a good cake is a good cake, I am sometimes itching to try something that wouldn't necessarily appeal to my typical audience or to just experiment with a flavor combination.  This was the perfect opportunity to pick whatever happened to appeal to me at the moment.


As I searched through my layer cake recipes there were only two requirements, the first was that it be a cake I felt like eating, the second requirement was that I needed to have all the ingredients.  I wasn't about to pack two kids in the store to pick up stray ingredients for a just-because cake.  Seeing that I did not want to make a cake that only I will eat, after selecting a few cakes that fit the bill I asked Hey, Babe which of them he'd like to try.  He selected a recipe for Coconut-Lime Cake.


Anyone catch that? Lime? Not the lemon given in the title?  Yeah, the lime that I thought I had was apparently an ex-lime.  Easy enough to sub in lemon zest instead, (all citrus fruits are interchangeable, right?).  So much for making sure I had all the ingredients.  My kitchen was rather chilly kitchen so I had to beat the butter-sugar mixture much longer than the recipe stated before it became fluffy, but other than those two changes, I stuck to the original recipe, aren't you proud of me?


The cake was delicious, nice and moist and lemony, but the frosting, oh yes, the frosting.  That is where I was most pleased with my efforts.  Recently, and from two separate sources, I have come across a recipe for making a flour based frosting.  Both sources praised the results of such a frosting.  Being intrigued, I decided to swap out the called for 7 Minute Frosting and try the flour based frosting.  Argh! Another deviation from the recipe!  Still, I wanted to see how it compared to my Swiss Meringue Buttercream which is my current favorite, so yes, I made another change.


Flavor-wise it would be a tough call to decide which method tastes better.  They are both awesome so I'm not going to split hairs over it.  Instead I'll just point out some pros and cons about this one.  While this frosting is super easy to make it does take time to cool completely between the first and second part of the recipe.  In fact, you should actually start the frosting before the cake to save time just waiting for it to cool.  It whips up very light and fluffy, but it does spread on smooth, hence the very rustic and homey look to this cake.  If you don't want to fuss with temperatures and egg whites, and don't need a smooth polished appearance, this frosting fits the bill.  It is creamy, and buttery and not overly sweet, and don't worry, no one would ever guess that flour was the secret ingredient.  I will be using this method quite often, I am sure.  I especially see it on future batches of cupcakes, where the spread of the frosting is not usually so demanding.


All in all, a wonderful success for a spur of the moment, just-because cake.  Please be sure to check out Allison's round up of all the other submissions for this months Sugar High Friday on the 30th, and thank you Allison for this months theme!


Lemon (or Lime!) Coconut Cake
adapted from Williams Sonoma
Ingredients
3 1/4 cups cake flour
1 Tbs. baking powder
3/4 tsp. salt
1 3/4 cups milk
1 Tbs. vanilla extract
16 Tbs. (2 sticks) unsalted butter
2 cups sugar
1 Tbs. finely chopped lemon zest (or lime)
4 eggs
1 recipe Boiled Milk Frosting (or your favorite vanilla frosting)
1 cup sweetened shredded coconut
1 1/2 cups sweetened shredded coconut (optional, for decorating)

Instructions
Preheat oven to 350°F. Grease and flour three 8-inch round cake pans; tap out excess flour.  Bring all ingredients to room temperature.

In a bowl, mix together the flour, baking powder and salt; set aside.

In a separate bowl, stir together the milk and vanilla; set aside.

In the bowl of an electric mixer, use the paddle to whip the butter on medium speed until creamy and smooth, 1 to 2 minutes. Add the sugar and lime zest and continue beating until light and fluffy, about 5 minutes.  Be sure to occasionally scrape down the sides of the bowl. Add the eggs one at a time, beating well after each addition.

Reduce the speed to low and add the flour mixture in three parts, alternating with the milk mixture.  You should both begin as well as end with the flour. Beat each addition just until incorporated, stopping the mixer occasionally to scrape down the sides of the bowl. To make sure I didn't over beat the batter, I stirred in the last addition of flour by hand, just until it was incorporated.

Spoon the batter into the prepared pans, spreading the batter evenly.  I weighed mine because I'm obsessive, but you can just eye it.  Instead of trying to spread the batter out with a spatula, I carefully gave each cake pan a quick spin to use centrifugal force to even out the batter.  The bonus to doing it this way is that it actually spreads the batter slightly higher around the edges than in the center which can help make your cake bake up more evenly.  Bake until the cakes begin to pull away from the sides of the pans and a toothpick inserted into the center comes out clean, 25 to 30 minutes. Transfer the pans to a wire rack and let the cakes cool in the pans for 15 minutes, then turn them out onto the rack and let cool completely.

For assembly:
Using a rubber spatula, fold into 2 cups of frosting the 1 cup of coconut just until incorporated.  Place one cake layer, top side down, on a serving plate. Using an icing spatula or a knife, spread half of the frosting mixed with coconut evenly on top. Place a second layer, top side down, on the first layer and spread the remainder of the coconut frosting evenly on top. Place the remaining layer, top side down, on the second layer. Spread the reserved plain frosting over the top and sides of the cake. Press the remaining coconut onto the top and sides if desired. Refrigerate the cake for 30 minutes before serving to set the frosting.

Yields: 12 Servings


Boiled Milk Frosting
Adapted From Cooks Country and The Pioneer Woman

Ingredients
1 cup granulated sugar
1/4 cup all-purpose flour
3 tablespoons cornstarch
1/2 teaspoon salt
1 1/2 cups whole milk (whole milk will make it richer than low fat milk)
2 teaspoons vanilla extract
24 tablespoons unsalted butter softened (3 sticks), cut into 24 pieces

Instructions
1. Mix together sugar, flour, cornstarch, and salt into a medium saucepan. Be sure to mix it well to prevent lumpy frosting.  Slowly pour in milk, whisking quickly until very smooth (again, you don't want lumps).  Over a medium flame whisk constantly until mixture boils and is very thick, 5 to 7 minutes. Scrape mixture into a clean bowl and cool to room temperature, about 2 hours.  (Here is where you should start making your cake)

2. Using a stand mixer (a hand mixer was not recommended as they said this mixture would be too thick) whisk cooled milk mixture together with vanilla on low speed until combined. Begin adding butter 1 piece at a time, and beat until they are all incorporated, about 2 minutes. Increase your speed to medium-high and whip until the frosting is light and fluffy, about 5 minutes. Let it sit at room temperature until stiff, about 1 hour.

This frosting can be made ahead and refrigerated in an airtight container for 1 week. When you are ready to use it, let it stand at room temperature about 2 hours or until softened.  Re whip it on medium-high speed until light and fluffy, about 1 minute. 

Variations: 
for chocolate frosting, add 1/4 - 1/2 cup of cocoa powder to the dry ingredients. 
for coffee frosting, add 1 1/2 tablespoons of instant espresso powder to the dry ingredients.
for cream cheese frosting (oh goodness!) replace 8 tablespoons (1 stick) of butter with 8 oz of softened cream cheese (and then eat it all with a spoon because, hello, this is cream cheese heaven!)

Makes about 4 cups (enough for two 9-inch cake layers)


Related Posts Plugin for WordPress, Blogger...